Park Department Disc Golf Sign Guide for Better Courses
A player standing at Hole 7 should not have to guess which basket is in play, walk back to the parking lot for a map, or ask another group where Hole 8 begins. Those small points of confusion add up quickly, especially at public parks that welcome first-time players, league nights, tournaments, and families on the same course. This park department disc golf sign guide outlines how to build a signage system that makes the course easier to use, easier to maintain, and more professional from the first tee to the final basket.
Start With the Player’s Actual Route
A strong disc golf sign plan is not a collection of individual signs. It is a connected navigation system. Before selecting materials or approving artwork, walk the course as a new visitor would. Begin in the parking area with no prior knowledge of the layout. Can you find the first tee? Can you identify practice baskets, restrooms, parking, and any park rules? Once the round starts, can you confidently move from one hole to the next?
This walkthrough often reveals the gaps that experienced local players no longer notice. A course may have excellent tee signs but no course map at the entrance. It may have a map but no directional signs at a long transition between holes. It may also have mismatched signs installed over several years, creating an inconsistent appearance and leaving players unsure which information is current.
Park departments should document these issues before requesting a design. Take photos at decision points, note where players commonly turn the wrong direction, and identify any areas where disc golf traffic overlaps with walking trails, playgrounds, roads, or protected natural areas. Those details help create signs that solve real on-course problems rather than simply filling space at each tee.
Build a Disc Golf Sign Hierarchy
Not every sign needs the same amount of information. In fact, trying to place a full course map, rules, sponsors, hole data, and park notices on every sign can make the course harder to read. The most effective systems give each sign a clear job.
At the course entrance, an overview sign should orient the player before the round begins. It typically includes the complete course map, hole numbering, major paths, amenities, safety notes, and contact information for the park department or course manager. This is also the best location for a larger course identity element, such as a park logo or course name.
At each tee, the sign should focus on the hole in front of the player. Directional signs handle transitions, especially when the next tee is not visible from the previous basket. Rule and etiquette signs belong where behavior matters most: near parking areas, shared-use paths, water hazards, or sensitive natural spaces.
A complete system commonly includes these four sign types:
- Course overview maps at parking areas, entrances, and other key arrival points
- Tee signs with hole-specific distance, layout, par, and navigation details
- Next-tee directional signs for long, hidden, or confusing transitions
- Rules, safety, and etiquette signs where park conditions require them
The right mix depends on the course. A compact nine-hole layout may need one overview map and simple tee signs. A wooded 18-hole championship course with multiple pin positions, alternate tees, and long walks between holes needs a more detailed approach.
What Every Tee Sign Should Communicate
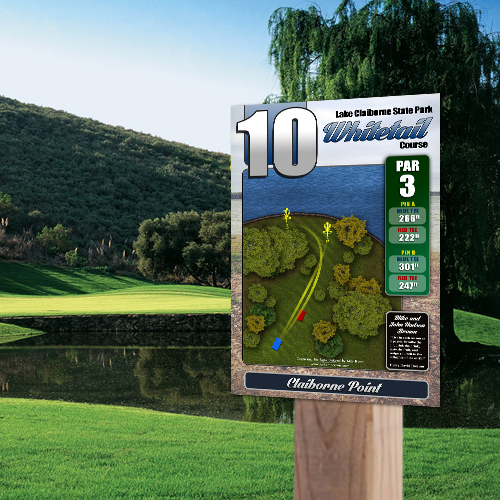
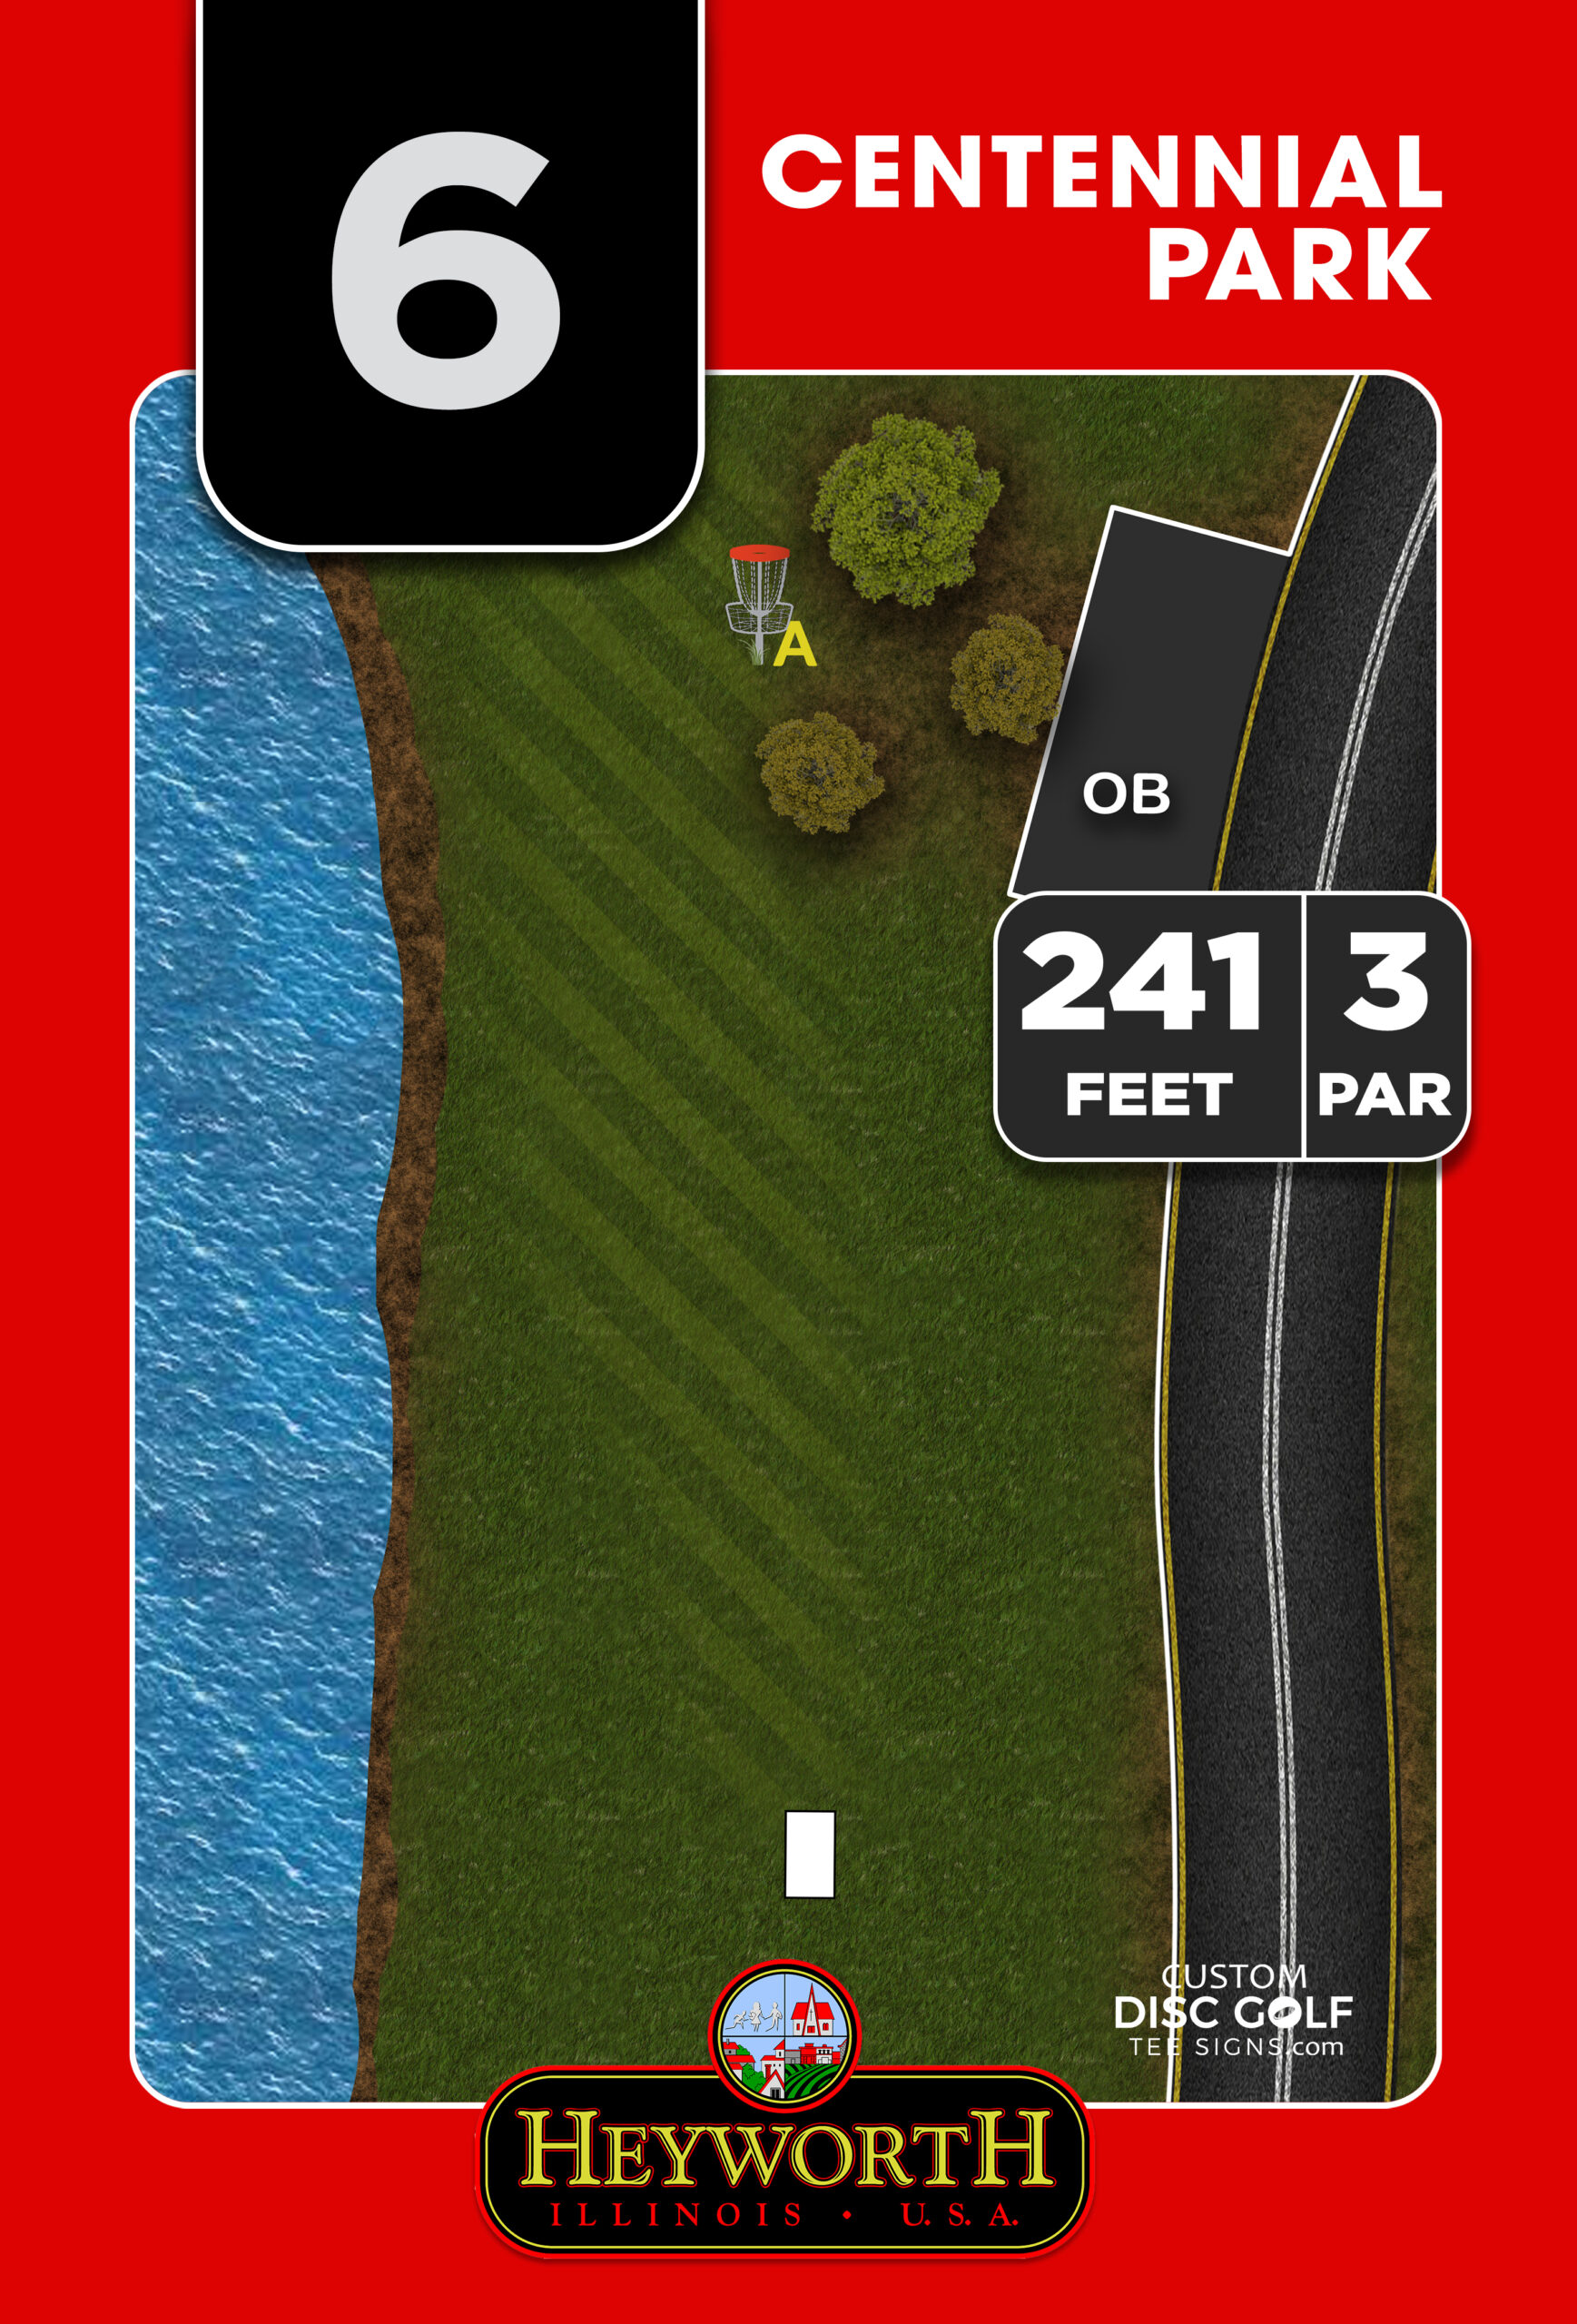
The best tee signs deliver information in the few seconds before a player throws. The hole number, par, distance, and a clear diagram should be instantly visible. The layout image should show the tee location, fairway shape, basket position, out-of-bounds areas, water, mando routes, and significant hazards when applicable.
For public courses, clarity matters more than decorative detail. A beautiful aerial image can be useful, but only if the fairway line, basket, and intended route remain easy to understand. Dense woods, elevation changes, and blind landing zones often require simplified custom artwork rather than a generic satellite-style image.
Multiple layouts require careful labeling. If the course includes short and long tees, alternate basket placements, or separate recreational and tournament configurations, the sign must make the active layout obvious. Color coding can help, but color should not be the only differentiator. Use labels, line styles, and clear symbols so the sign remains usable for every player.
Sponsor placement can also be incorporated without taking over the sign. A dedicated sponsor area creates a clean, repeatable format that supports fundraising while protecting the hole information players need most. When every sponsor logo is treated differently, the course can look cluttered. A consistent sponsorship format gives local businesses visibility and keeps the overall system professional.
Choose Materials for Public-Park Conditions
Park signage is exposed to sun, rain, moisture, temperature changes, mower traffic, discs, and occasional vandalism. Material selection should reflect the site, expected use, and maintenance capacity. The least expensive option is not always the most economical when replacement, fading, or frequent repairs are considered.
Aluminum composite is a popular choice for full-color disc golf tee signs because it is rigid, durable, lightweight, and well suited to detailed printed graphics. Aluminum is another strong option for facilities that want a premium long-term finish. In either case, UV-protected production is essential for preserving color and readability through repeated exposure to direct sunlight.
Sign size also affects usability. A small sign may be sufficient for a straightforward open hole, while a complicated wooded hole needs enough space for a readable map and sponsor area. Consider viewing distance, mounting height, and whether the sign will be read by players standing beside a tee pad or from a path.
Posts and mounting hardware deserve the same attention as the panels. Choose a stable installation method appropriate for the park’s soil, mowing equipment, and local maintenance practices. Position signs where players can read them without blocking trails, creating trip hazards, or interfering with the throwing area.
Use Design to Reinforce Park Standards
Disc golf signage represents more than the course. It reflects the park department’s standard of care. A coordinated color palette, consistent typography, recognizable park branding, and professionally drawn hole layouts make the facility feel planned and maintained. That perception matters when parks are seeking tournament opportunities, community support, sponsorships, or future funding.
Consistency also helps operations. When a basket location changes or a hole is redesigned, staff should know which file, material, and design standard to use for replacement signage. A custom design system makes it easier to update individual panels without starting over or introducing another mismatched sign style.
Course managers should provide accurate source information early in the process. That includes measured distances, par, tee and basket locations, current course maps, park logos, sponsor requirements, rules language, and photos of the site. The design and proofing stage is where these details should be checked carefully. Once signs are installed, correcting a distance, arrow, or basket position is more costly than reviewing the proof with course staff and local players beforehand.
Plan for Funding and Stakeholder Approval
Signage projects often involve more than one decision-maker. A park department may oversee the property, a local club may supply course knowledge and volunteer labor, and sponsors may help fund the project. Clear roles prevent delays.
Start with a defined scope: how many tee signs, directional signs, maps, and rule signs are needed? Then separate the must-have improvements from future upgrades. If funding is limited, prioritize the entrance map, clear tee signage, and the transitions where players routinely get lost. A second phase can add sponsor panels, premium map displays, alternate layout signs, or additional wayfinding.
Sponsorship can make a higher-quality package attainable, but it needs structure. Establish the sponsor cost, logo specifications, placement area, renewal period, and approval process before outreach begins. A standardized sponsor-ready sign program is easier to explain to businesses and easier for park staff to manage year after year.
Custom Disc Golf Tee Signs supports this process with course-specific artwork, proofing, durable full-color materials, sponsorship integration, and free shipping. The goal is not to force a generic template onto a unique property. It is to create a sign package that fits the course, the park’s visual standards, and the way players actually move through the space.
Install, Inspect, and Keep Information Current
Sign installation should happen after one final field review. Verify that each panel matches the correct tee, faces the intended viewing direction, and remains visible once vegetation is full. Check directional arrows from the point where players will need them, not just from a map or maintenance vehicle.
After installation, ask a few new or casual players to walk the course and note where they hesitate. Their feedback is often more useful than that of regulars who already know every route. Seasonal inspections should look for fading, loose hardware, storm damage, graffiti, and course changes that affect the accuracy of the sign.
A well-planned signage system gives every player a clearer round and gives your park a course presentation worth being proud of. When the map, tee signs, materials, and sponsorship plan work together, the improvement is visible before the first disc leaves the tee.