Course Signage Workflow Guide for Disc Golf
A player standing on Hole 7 should not have to guess where the basket is, wonder whether the creek is out-of-bounds, or walk halfway down the fairway to find the next tee. A clear course signage workflow guide prevents those problems before production begins. More importantly, it gives clubs, park departments, and volunteer teams a reliable way to move from scattered course information to a professional, durable signage system.
A successful project is not just a print order. It is a coordinated process of gathering accurate course details, choosing the right sign package, approving artwork, planning sponsor placement, and preparing for installation. When those steps happen in the right order, your course looks more polished and players get the information they need at every tee.
Start With a Complete Course Audit
Before discussing colors, materials, or sign shapes, walk the course and document what is actually needed. This is where many projects gain or lose momentum. A course may need more than tee signs. It may also need an entrance sign, a course overview map, directional signs between holes, rules signage, and parking guidance.
Bring a phone or tablet, a printed scorecard if one exists, and a simple worksheet for every hole. Record the par, distance, tee pad type, basket location, alternate pin positions, major hazards, mandatory routes, out-of-bounds areas, and the path to the next tee. Take photos from the tee looking down each fairway. These images help confirm details later and give the design team useful visual references.
Pay attention to inconsistencies. If the posted distance differs from the scorecard, resolve it before artwork starts. If Hole 12 has two tee pads but only one is currently marked, decide whether both will be included in the project. Signage is most effective when it reflects how the course is played now, not how it was originally planned years ago.
Assign One Decision-Maker for the Signage Project
Course improvements often involve a club board, parks staff, volunteers, donors, and sponsors. That support is valuable, but too many separate approval channels can delay a project. Choose one project lead who can collect feedback, confirm final course information, and provide consolidated approval.
The project lead does not need to make every decision alone. They should consult the course designer, maintenance staff, and experienced local players when reviewing hole layouts. Their role is to keep comments organized and prevent conflicting revisions from reaching the design stage.
This is especially helpful for municipal and public-course projects. A parks department may need to approve branding, rules language, placement standards, and installation methods. Establishing those requirements early protects the schedule and avoids reworking finished designs after a late review.
Choose a Sign System That Matches the Course
The right package depends on the course’s traffic, budget, environment, and long-term goals. A basic navigation-focused system can provide clear hole numbers, distances, pars, and directional information. That may be the right starting point for a newer community course or a volunteer-funded upgrade.
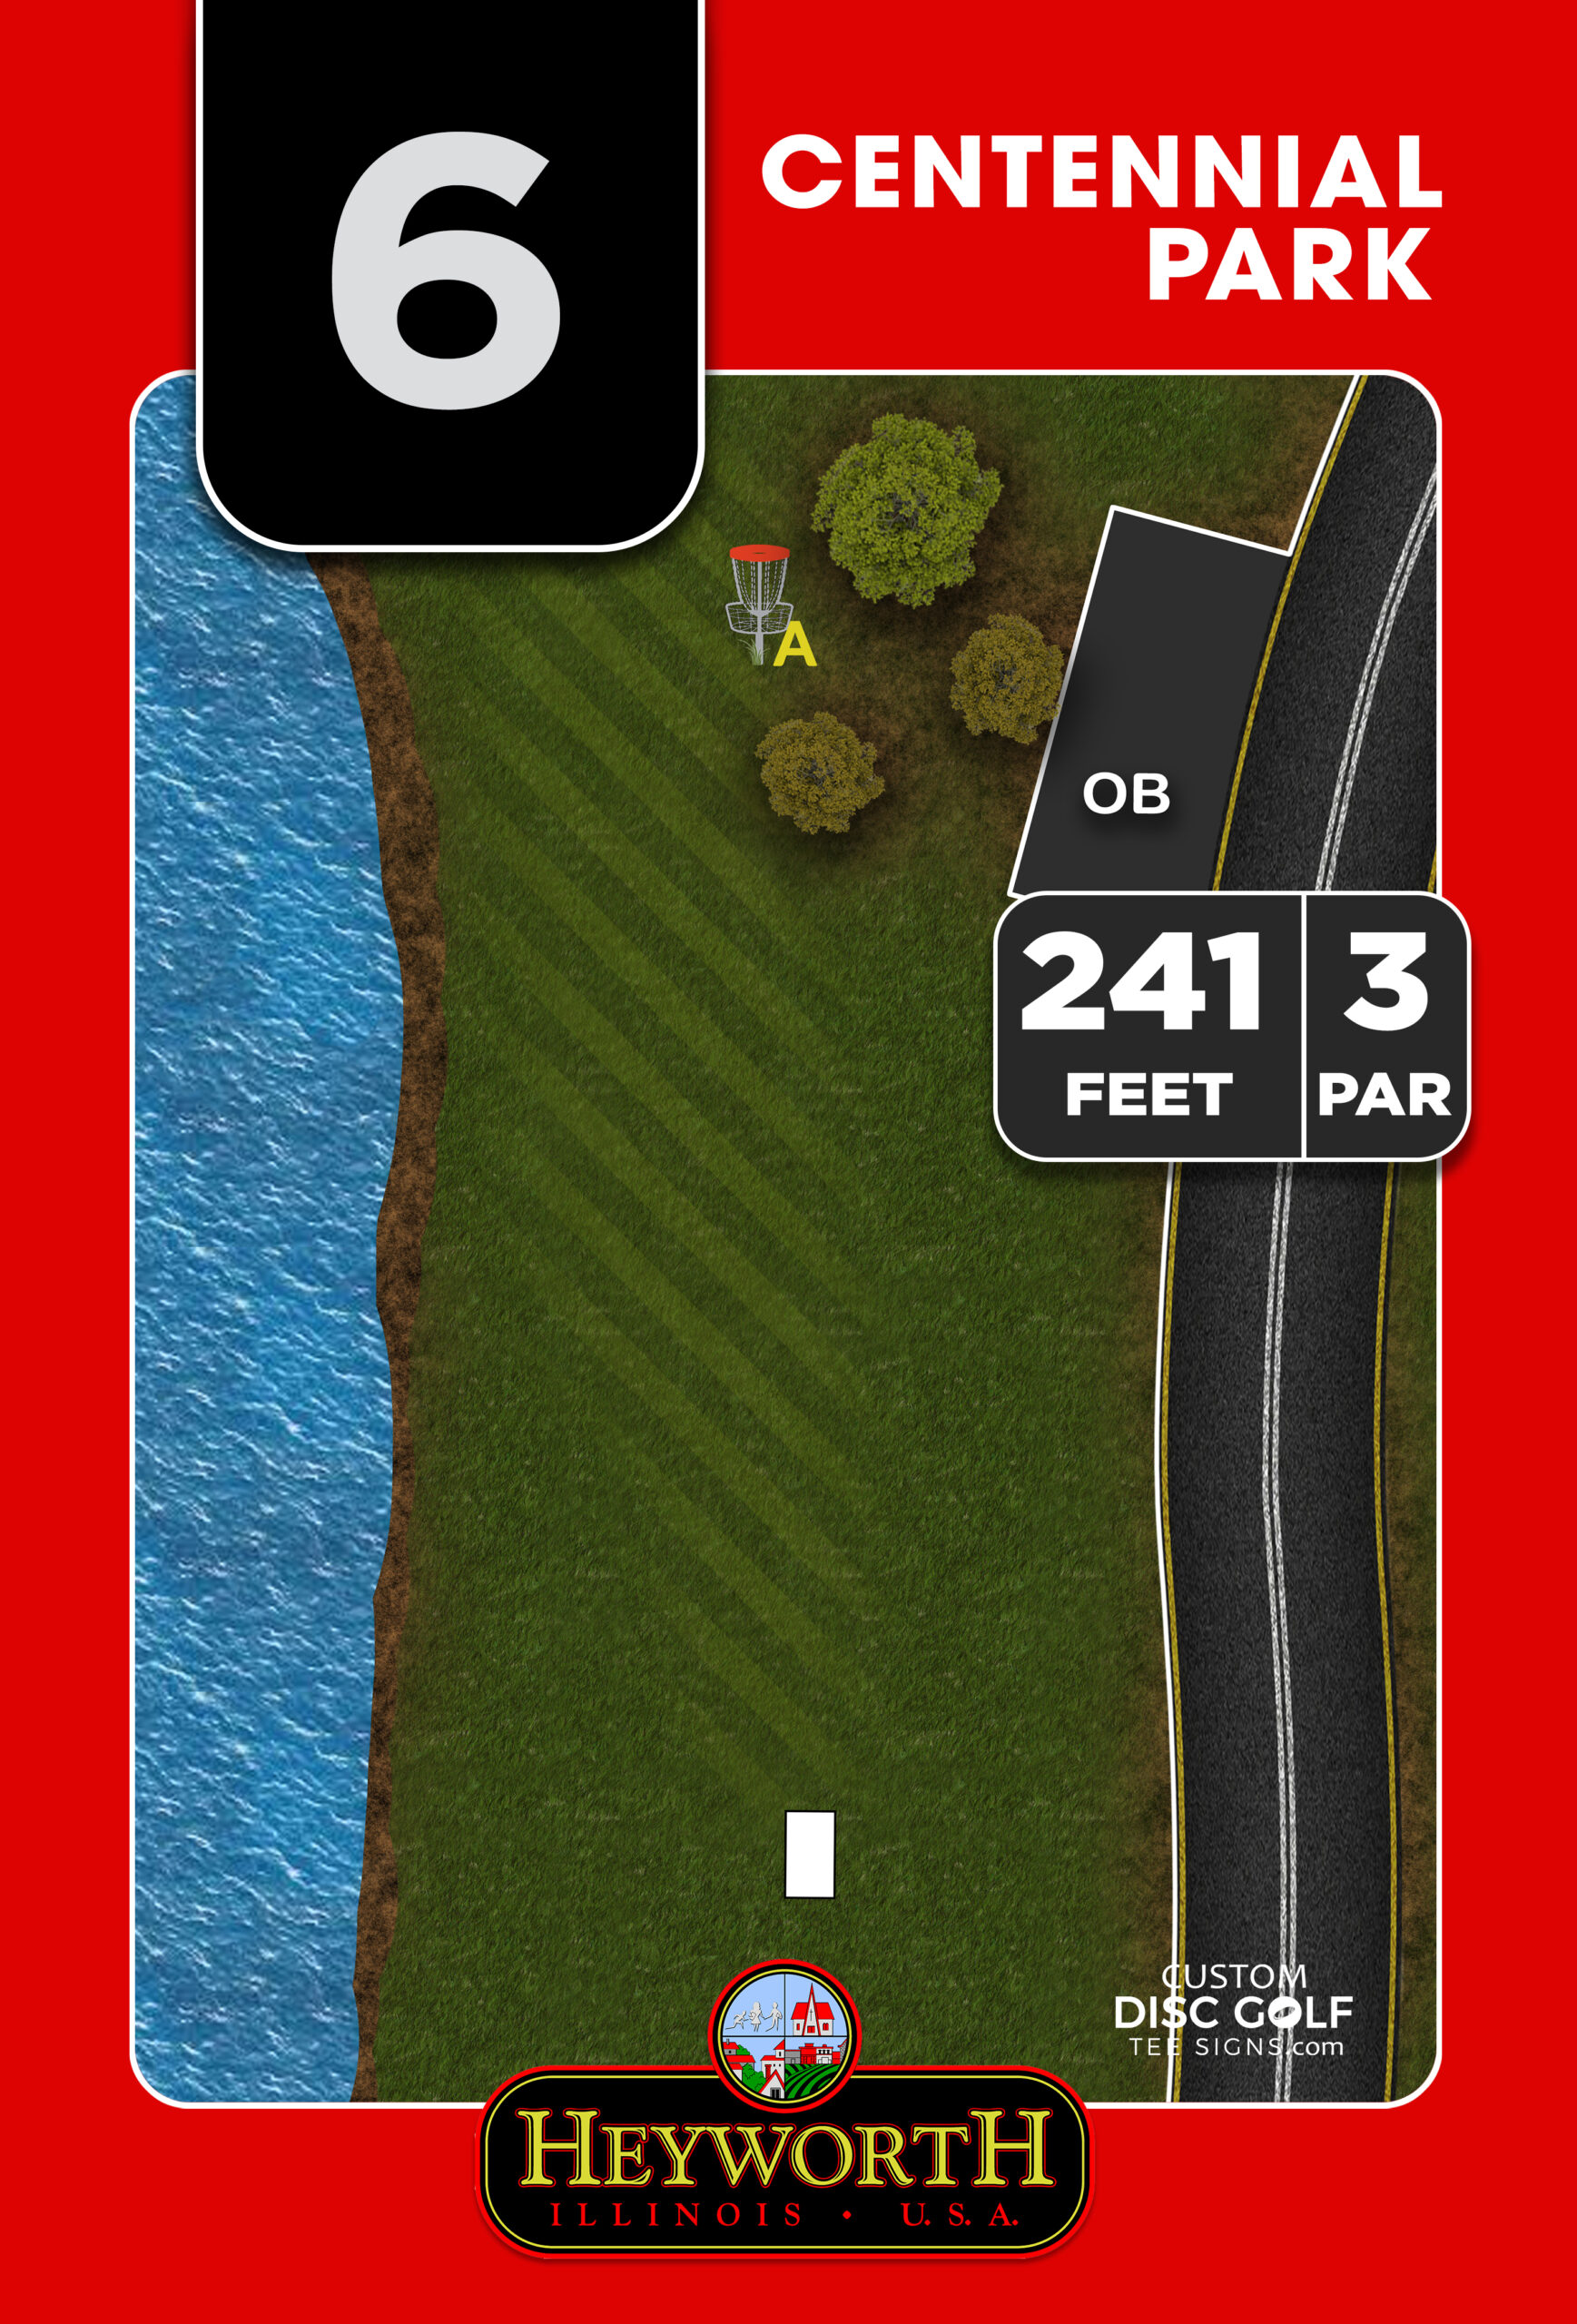
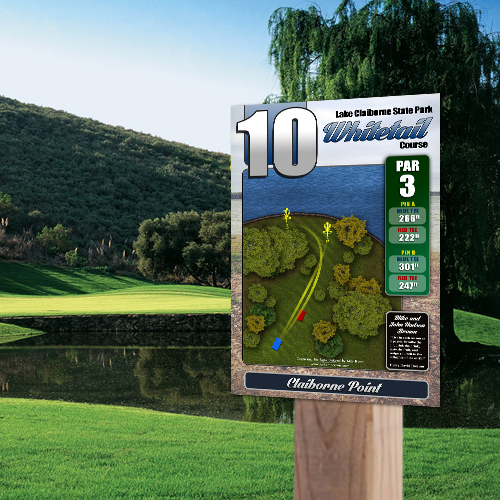
For established destination courses, detailed full-color tee signs usually create a stronger player experience. Hole maps can show fairway shape, elevation cues, wooded corridors, water, out-of-bounds lines, alternate baskets, and major landmarks. This is particularly valuable on technical layouts where a distance number alone does not help a first-time visitor make a confident shot selection.
Material selection also matters. Aluminum composite is a practical option for many disc golf facilities because it is rigid, weather-resistant, and well suited to full-color graphics. Aluminum can be the better choice where maximum long-term durability, a more premium finish, or demanding environmental conditions justify the added investment. The best choice depends on your installation hardware, climate, vandalism risk, and replacement budget.
Do not treat every sign as an isolated piece. A consistent system should carry the same course name, typography, colors, icon style, and information hierarchy from the entrance through the final hole. Consistency helps players recognize information quickly and gives the property a higher standard of presentation.
Build Accurate Hole Information Before Design Begins
Good design cannot compensate for incorrect source information. Create a master document that lists every confirmed detail for each hole. This should include hole number, par, distance, tee designation, basket designation, hazards, mandatory routes, and any local rules that belong on the sign.
For layouts with multiple tees or rotating baskets, decide how the signs will handle change. Permanent signs work best when the information is stable. If pin positions rotate frequently, consider a clear method for showing the current position or use a layout that displays both positions without creating visual clutter. It depends on how often maintenance staff updates the course and how much detail players truly need from the tee.
Course maps deserve the same scrutiny. Confirm parking, practice areas, restrooms, kiosk locations, emergency access, walking paths, and transitions between holes. A well-designed overview map reduces confusion before a round starts and can keep players from crossing sensitive areas or entering unauthorized spaces.
Use Proofing to Protect the Project
The proofing stage is where a custom signage workflow earns its value. Review every sign as though you are a visiting player who has never seen the property. Can you identify the hole number immediately? Is the distance easy to read from a few feet away? Does the map clearly show the intended line? Are sponsor logos positioned without competing with course information?
Check facts first, then check appearance. Confirm spelling, distances, par values, local rule wording, logo files, color selections, and contact information. Next, look for visual problems such as crowded legends, small sponsor marks, low-contrast text, or maps that make hazards difficult to distinguish.
Avoid reviewing proofs casually on a phone if possible. A desktop screen or printed proof gives a better sense of legibility and spacing. Ask the people who know the course best to review the technical details, but keep final feedback consolidated through the assigned project lead. A clear approval process is faster than a long chain of individual edits.
At Custom Disc Golf Tee Signs, the design-to-proofing process is built around course-specific artwork rather than generic templates. That gives teams the flexibility to represent the actual character of their property while maintaining a clean, readable system.
Plan Sponsorship Without Sacrificing Readability
Sponsorship can turn an underfunded signage goal into an achievable project. A local business may be willing to support a tee sign, a group of holes, an entrance map, or the full course system in exchange for visible recognition. For clubs and Eagle Scout project coordinators, that support can reduce the amount that must be raised through donations or events.
The key is to establish sponsor standards before outreach begins. Decide the logo area, recognition period, renewal process, and whether sponsor placement varies by package level. Give every potential sponsor a simple explanation of what their contribution supports: better navigation, stronger course identity, more enjoyable rounds, and a lasting public recreation asset.
Keep player information in the primary visual area. A sponsor logo should be clear and professionally integrated, but it should never make the hole number, distance, or fairway map harder to use. This balance protects both the sponsor’s investment and the quality of the player experience.
Prepare for Production and Installation
Once proofs are approved, production should move forward without last-minute changes. Confirm the final sign count, material, sizes, mounting method, shipping address, and site contact. If posts or frames are being sourced separately, verify dimensions and hole patterns before signs arrive.
Installation is not an afterthought. Walk each location again and consider sunlight, mower access, player traffic, drainage, visibility from the tee, and the possibility of future tee pad changes. Signs should be easy to read without becoming obstacles or creating hazards around the throwing area.
Before installation day, verify these practical details:
- Every sign is labeled or organized by hole number.
- Posts, frames, concrete, fasteners, and tools are on site.
- Utility checks and park requirements have been completed.
- A final placement plan identifies each tee and directional sign location.
- One person is responsible for inspecting alignment and orientation as signs are mounted.
After installation, walk the course from the perspective of a first-time player. Follow every transition, read every map, and look for points where someone might still hesitate. A small directional adjustment or corrected arrow can make a major difference in how the finished system performs.
Professional signage is one of the few course improvements players notice before their first throw and remember after their round. Give the planning stage the same care you give the finished signs, and your course will be easier to navigate, easier to support, and better prepared to welcome the next group of players.